Showing posts with label Windows. Show all posts

Monday, 13 October 2014

How to install the Windows 10 Technical Preview on a Mac

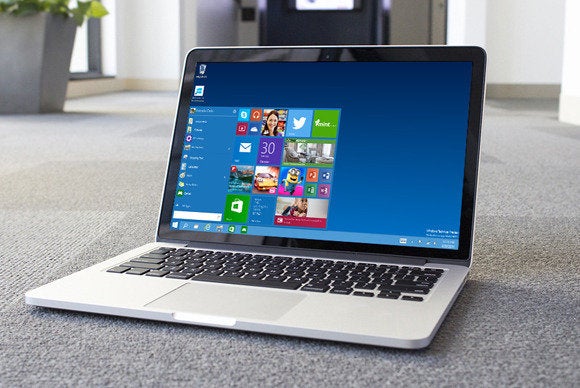
pcw windows on mac primary

How to install the Windows 10 Technical Preview on a Mac

dakudydi@yahoo.com

It may seem like mixing oil and water, but as it turns out, installing Windows on your Mac isn't a violation of natural law—your Retina display won't melt or anything!
In fact, doing so is actually a relatively pain-free process. To give the Windows 10 Technical Preview—a very early pre-release version of Windows 10—a whirl, you don't even have to pay for a Windows license or already have Windows on your Mac. The Technical Preview is free to test.
Intrigued? Let's dig in.

Decisions, decisions

There are two ways to get the Windows 10 Preview on your Mac.
The first is to install Windows on a separate partition of your hard drive using Apple’s built-in Boot Camp software. When finished you can boot directly into Windows, essentially transforming your Mac into a full-blown Windows PC.
windows 10 chrome
Get Chrome or your other favorite apps on Windows 10.
Another option lets you run Windows as a virtual machine inside an OS X program. We'll be using the open-source VirtualBox from Oracle, though Parallels Desktop is a popular alternative (it costs about $80). A virtual is the route we recommend, given that the Windows 10 Technical Preview is still in very early form, with the occasional rough edge or bugginess popping up. If something goes wrong on a virtual machine, it won't affect your hardware or OS X installation—you can just wipe it and start over.
windows 10 mac start menu
The Windows 10 Start menu is back, and you can have it on your Mac.
As with any pre-release software, one person's experience may vary with another's. Mine was pretty issue-free: I installed Windows 10 on a late 2014 MacBook Pro with a 2.6Ghz i5 processor with 8GB of RAM. Any Mac released in recent memory should be able to run Windows 10 just fine.
Whatever you do, back up your Mac's data first. Didn't you hear the part about the Windows 10 Technical Preview being very early experimental software? You don't want to lose all your valuable documents and family videos if Microsoft's OS hiccups.

Download the ISO

Done backing up? Good. First we'll head to the Windows 10 download site to download the Technical Preview. You’ll have to sign up for the Windows Insider Program by giving Microsoft your email address. 
After registering—note all the warnings about this being pre-release software, and Microsoft's stern warnings about backing up your data—select the version of Windows 10 that's right for your particular system. If you're running a relatively recent Mac with an Intel processor, opt for the 64-bit version. It's nearly 4GB, so get comfy—the download may take a while. Jot down the product key, too; we didn't need it in our testing but it's a good thing to keep in your back pocket just in case.

Install Windows 10 in VirtualBox

Let’s explain how to get Windows 10 running in a virtual machine first, since that's our recommended method. Head to the Oracle VM downloads page, and select the VirtualBox version built for for OS X hosts.
Launch the download, dragging the icon into the Applications folder. Included is a 300-page PDF if you want a thorough set of instructions—though you can skip those and keep reading this if you don't have time or desire to brush up on VirtualBox's most arcane secrets.
At the VirtualBox launch screen, you'll be asked to choose which operating system to install. I chose “Windows 8.1” from the menu, as it's the most recent version of Windows. Windows 8 should probably work out as well—just be sure to select the appropriate 64-bit or 32-bit option based on the version of Windows 10 you downloaded.
virtualbox windows selection
Choose Windows 8.1 from the long list and get ready for some virtual computing.
VirtualBox will then ask you how much RAM to allocate to running the virtual machine. You can go with the default of 2048MB if you’re concerned about system resources, but Windows 10's performance will increase if you can dedicate more—you are running another operating system simultaneously, after all. If you can bump it up to 4GB without starving OS X's own resources, that'd be perfect.
Next you’ll be asked to create a virtual hard drive for Windows 10. Unless you’re planning on doing extensive work or installing more software, you can safely choose the default of 25GB. Select the VirtualBox Disk Image option on the next screen and continue.
virtualbox optical disk
Locate the ISO file for VirtualBox and get ready to install Windows.
The next choice is to select a dynamically allocated hard drive or fixed one. As you can probably figure out from the context, the former grows as you add space, and it’s a better choice if you're short on space and don’t plan on adding that much to your Windows mock computer. The fixed drive, on the other hand, will give you faster performance as long as you can spare the room.
virtualbox optical disk
Locate the ISO file for VirtualBox and get ready to install Windows.
When all that's done, highlight the Windows 10 VM in the VirtualBox dashboard and select the green "Start" arrow. You'll be prompted to point the VM towards the Windows 10 .iso file. After doing so, you'll see the Windows logo with a black background. You're on your way!.
The Windows signup screen will appear next. Pick a language and hit Install now. Then you’ll have two choices: a custom or upgrade installation. Select custom, then choose a specific location on the hard drive for installing Windows. Just leave this as-is—it's installing to the virtual hard drive created by VirtualBox.
Windows 10 startup
This is the first screen you'll see when installing Windows 10.
Now it’s time to install Windows and plug in your Microsoft account credentials. If you don't have an existing account, you'll need to put in an email address to satisfy the Windows gatekeepers. This enables you to save and sync settings across multiple Windows devices.
Voila! You’re running Windows 10 on your Mac. You'll probably want to check out PCWorld's guide to exploring Windows 10.  
Running a virtual machine is a slightly different experience than running an operating system on a hard drive. Things may move a little slower and appear janky. But it works fine for getting basic work done, or just plain playing around with Windows 10.
When you're done, just close the VM's window as you would anything else. You’ll be prompted either to save the machine’s state as-is or power it off.

Using Boot Camp with Windows 10

If you want the full Windows Technical Preview experience, you can use Apple’s Boot Camp tool to install Windows 10 straight to your hard drive and boot directly into Windows. (You did remember to back up your data first, right?)
For this you'll need a USB drive with at least 4GB of free space. Boot Camp will take the Windows ISO file and create a boot disk that can be used to install Windows on your Mac. 
boot camp launch
Boot Camp Assistant is your friend for installing Windows.
Assuming you already have the Windows 10 .iso downloaded, launch Boot Camp. Tick all the boxes and proceed.
Insert your flash drive and then select the .iso file's location. Boot Camp will then download all the necessary drivers to run Windows and transform your USB drive into a boot disk. This step takes a while, so be patient.
You’ll then be asked to partition your hard drive. This is a critical step, as you can't expand or shrink the storage later on. Instead, you’ll have to wipe that part of the drive and start from scratch.
boot camp partition
Decide how much hard drive space to devote to Windows.
It’s recommended you select at least 20GB, but 30GB or more is best, as Windows 10 itself will take up a sizable chunk. Consider how much you will be using it: Is it just for casually tinkering or do you want to install Office and do some serious work? If you want to play PC games, definitely bump up the free space you devote to Windows.
When you're done, click Install to start (you guessed it) installing Windows 10.
Windows will next restart a couple of times. The longest wait will be when it hits the “We’re getting our apps ready” screen, which sat on my machine for 10 minutes. It does, however, cycle through some pretty colors for your viewing pleasure.
If for some reason your computer boots back to OS X, reboot and hold the Option key. This brings up a menu where you can select which operating system to launch. 

A few impressions

windows desktop
Use the Boot Camp Assistant help menu for troubleshooting issues.
Overall, Windows 10's performance on the Mac seems good. Scrolling with the trackpad works great with native Windows apps, such as File Explorer or Start menu, but it's a little janky with browsers (I tried it with Chrome and Internet Explorer). I found myself reverting to clicking and holding the toolbar to scroll through a page. Windows doesn't have as many trackpad gestures as OS X, either, so using a mouse may be a good idea.
The brightness was a little inconsistent, fluctuating between too bright or too dark. The backlit keyboard was also confused: Trying to reduce its brightness didn't work at all until the next-to-lowest setting, which then plunged the keyboard into near-darkness.
Such inconsistencies are to be expected with a pre-release operating system, however. If you run into trouble or want to check system requirements further, both Microsoft and Apple offer a support page. And if you want to return to Apple's warm embrace, just hold down the Option key during a reboot and select OS X as your chosen OS.

Thursday, 17 April 2014

Forward to the past with Windows update: review


NEW YORK: Even as Microsoft prepares for a future dominated by touch-screen devices, it is steering its Windows system to embrace more of the past.

The divide between old and new is less pronounced in the latest, free update. That's a welcome change, as that's one of the things that annoy me most about Windows 8.

As sales of smartphones and tablets grow rapidly, Microsoft reshaped Windows so that PCs came to look, work and feel more like mobile devices.

Windows 8 has a full-page, tablet-like start screen filled with large icons, or tiles. Traditional mouse and keyboard controls still work, but it's more efficient if you use touch-screen controls. Windows 8 has a desktop mode that resembles older versions of Windows, but it steers users toward the touch-centric tile mode.

Many people hated Windows 8 when it came out in October 2012.

Microsoft responded a year later with Windows 8.1. With the free update, people can change settings to boot computers directly into the desktop. Windows 8.1 restores a Start button on the lower left corner of the desktop, though without all the functionality found in older versions. Windows 8.1 also lets people add their favorite desktop apps to a horizontal taskbar at the bottom of the screen.

In short, Windows 8.1 doesn't try to force people into the tile screen as often.

Still, Windows 8.1 feels like two separate systems. Your favorite desktop apps are on the desktop's horizontal taskbar, while your favorite tile-mode apps are on the tile-based start screen. How you perform tasks such as closing an app depends on which mode you're in.

Last week's update, simply called Windows 8.1 Update, brings more consistency:

- The tile screen now has prominent buttons for key controls - namely search and shutting down. No longer do you have to figure out how to pull those options out like a sock drawer from the right side of the screen. Microsoft could have gone further by also including a button for settings, but I'm getting greedy.

- Closing apps in the tile mode used to require moving your cursor to the top, clicking the mouse or pressing the screen until the app shrinks and dragging all that to the bottom. Gone was the "x'' at the top right of all apps to close them.

That "x'' is back, along with a button to minimize, or hide, the app while leaving it running. Unlike past versions of Windows, these buttons at the top disappear until you move the cursor to the top. The good news is this works whether you're in desktop or tile mode, contributing to consistency.

- That desktop taskbar at the bottom now accepts your favorite tile-based apps as well. You're no longer left with some of your favorites in one place, and the rest in another. And the taskbar now appears when you're in tile mode, too, though it's hidden until you move the cursor to the bottom.

- By default, laptops and desktops boot to the desktop mode, without a setting change required on your part. Tablets still go to the tile-based start screen more fitting for tablets.

- Opening a photo, music or video file in the desktop no longer takes you to a tile-based app. You stay in the desktop and use desktop versions of the apps instead. And closing a tile-based app now brings you to the previously used app, not automatically to the tile-based start screen.

These tweaks, though small, are significant when considered on the whole. It's as though Microsoft is acknowledging that tablet-style controls aren't always best for PCs, especially those without touch screens.

In unveiling the update, Microsoft also hinted at a future that embraces even more of the past:

- Even with the update, you're restricted to two to four tile apps on the same screen. You can decide how much horizontal space each app takes, but you can't adjust the vertical space or have an app overlap over part of another.

Microsoft promises that in a future update, you'll be able to run tile apps as regular windows in the desktop mode. As long as you stay in the desktop, there would no longer be a distinction between the two types of apps.

- Clicking on that restored Start button in the desktop now takes you to the tile-based start screen. You can't open apps or access settings from that button, the way you could with previous versions of Windows. In a future update, you'll be able to do that.

Microsoft hasn't said when the next version will come out, but that preview and last week's update together show that Microsoft is listening to customers.

Many people have resisted buying a Windows computer because of the abrupt changes Windows 8 forces on users. The latest changes will give potential buyers fewer reasons to resist.